Foraging & Sterilizing Wild Cushion Moss for Terrariums
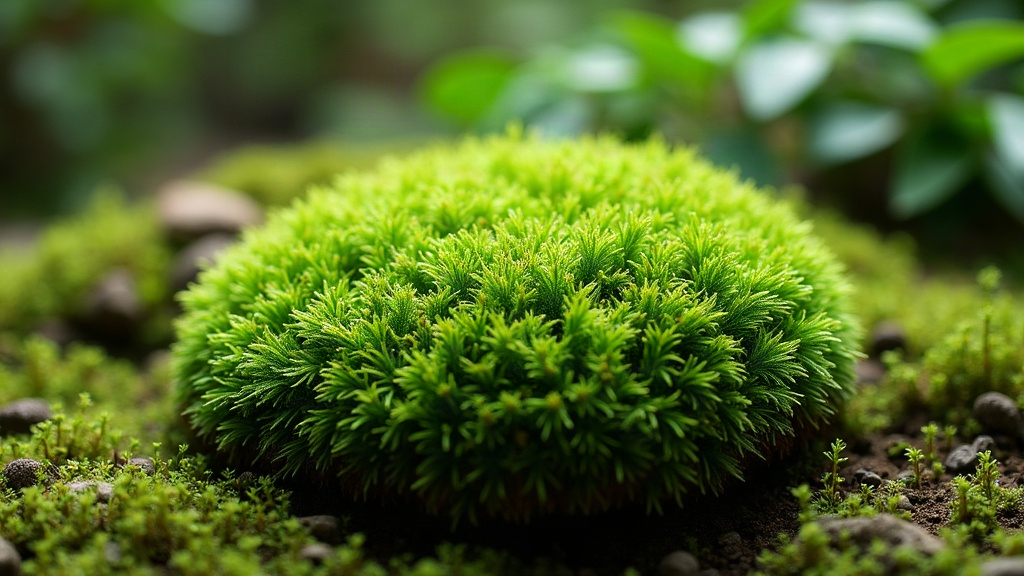
Cushion moss (usually Leucobryum glaucum or one of its pillow-forming cousins) might be the single best material you can drop into a closed terrarium. It holds its shape, it holds moisture, and it just looks right. The catch? Wild-collected moss often comes loaded with pests, mold spores, and soil organisms that can quietly destroy a sealed ecosystem from the inside. This guide covers ethical foraging, proper cleaning, and safe sterilization, so your moss actually thrives instead of turning your build into a science experiment gone wrong.
Why Cushion Moss Works So Well in Closed Terrariums
Cushion moss grows in dense, rounded clumps that keep their shape and trap humidity remarkably well, which is exactly why aquascapers and terrarium builders reach for it so often. Unlike sheet moss, it stays compact instead of sprawling everywhere. That means it won’t smother your smaller plants, and once it’s properly cleaned, it won’t give pests anywhere to hide.
Think about where this stuff actually grows: shaded forest floors, the sides of rotting logs, acidic little soil pockets tucked under tree roots. That tells you everything about what it wants indoors, low light, steady moisture, and decent airflow while it acclimates, before you ever seal the lid.
Foraging Responsibly: Where and How
Choosing a Legal, Ethical Site
- Never collect from national parks, protected reserves, or private land without permission. This one’s non-negotiable.
- Public forests and your own backyard (assuming it’s moss-friendly) are usually safe options, but check local regulations first. Rules vary more than people expect.
- Take only small patches, a few square inches at a time, and spread your collecting across several spots rather than stripping one patch bare. Moss grows at a glacial pace, sometimes just a few millimeters a year, so what looks like “plenty” to you took a decade to form.
What to Look For
- Firm, springy cushions with even green coloring. Skip anything yellowing, slimy, or showing visible mold.
- Flip it over and check the underside for activity. Springtails are actually a good sign (they’re beneficial detritivores), but ants, slugs, or larvae mean walk away.
- Where you can, collect moss growing on rock or bark rather than straight out of soil. It tends to be cleaner and comes away intact much more easily.
Tools You’ll Need
A small flat knife or spatula for prying moss loose, a breathable paper bag (plastic traps heat and practically invites mold to grow during transport), and a spray bottle to keep your samples lightly damp on the way home.
Cleaning: The First Line of Defense
Before you touch any sterilization method, rinse the moss gently under lukewarm running water to knock loose dirt, debris, and any hitchhiking insects. Pick through it by hand, removing twigs, leaf bits, and anything that moves. Don’t scrub. Cushion moss rhizoids are fragile and tear far more easily than they look.
Then soak the moss in plain water for 10 to 15 minutes. This step alone often pushes hidden pests up to the surface, where a pair of tweezers can finish the job.
Sterilizing Wild Moss Safely
Full sterilization isn’t the goal here, and frankly it can kill the moss outright. What you actually want is pest and pathogen reduction. Below are the three home methods that reliably work.
1. The Boiling Water Method (Most Common)
Dip the moss in water that’s just come off a rolling boil, 5 to 10 seconds, no more, then plunge it straight into cold water. This kills off most pests, fungal spores, and stray weed seeds without frying the plant tissue itself. Go too long and you’ll end up with brown, dead moss, so keep an eye on the clock.
2. The Microwave Method
Put rinsed, damp moss in a microwave-safe container with the lid sitting loosely on top, then run it 30 to 60 seconds on high. The steam generated inside does the work, wiping out most pests. Let it cool completely before you handle it, and watch for a slight color shift, that’s your cue you pushed it too far.
3. The Hydrogen Peroxide Soak
Mix 3% hydrogen peroxide with water at a 1:10 ratio and let the moss soak for 5 to 10 minutes. It’s gentler than either heat method and does a solid job against mold spores and bacteria, though it’s less effective on larger insects. Rinse well when you’re done.
Skip bleach entirely. Even diluted, it’s too harsh on moss tissue, and it leaves behind residue that can hurt other creatures living in the terrarium down the line.
Quarantine Before You Seal the Terrarium
Here’s the step people skip and regret: after sterilizing, keep the moss in an open container for 5 to 7 days before it ever goes into a sealed terrarium. During that window, watch for:
- Mold growth (white or black fuzzy patches)
- Insects emerging that you didn’t catch earlier
- Browning or general die-back
Only moss that comes through quarantine still green and odor-free earns a spot in a closed setup.
Final Tips for Long-Term Success
- Closed terrariums want indirect light, period. Direct sun through sealed glass will cook the moss in there like a greenhouse gone wrong.
- Mist lightly for the first two weeks so the moss can re-establish before you close the lid for good.
- See mold after sealing? Open it up, pull the affected moss, improve the airflow, then reseal. Don’t panic and don’t ignore it either.
Conclusion
Wild cushion moss brings a genuinely lush, authentic look to a closed terrarium that’s hard to match with anything store-bought. But skip the cleaning and sterilization steps and you’re gambling with pests or mold that become nearly impossible to fix once the lid goes on. Forage with some restraint, clean it properly, pick a sterilization method that fits your setup, and always give it a quarantine period before committing. Put in that bit of patience upfront, and you’ll get years of low-maintenance, genuinely thriving greenery behind the glass.